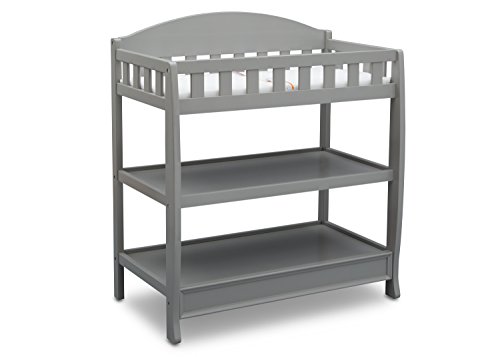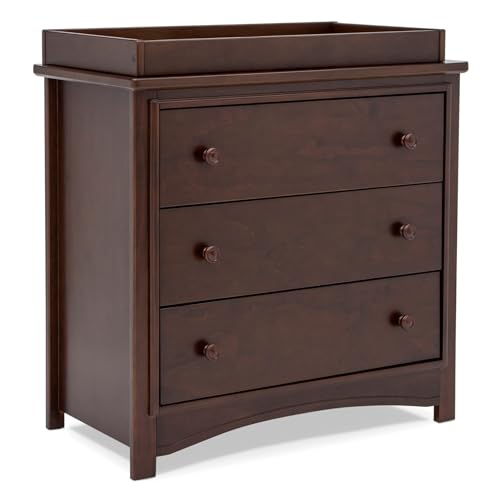
Changing Table To Go On Top Of Dresser: A Practical Nursery Solution
Turn the dresser you already own into a safe, comfortable diaper changing station with a removable topper. Here is everything you need to know before you set one up.
Why this setup works: A changing table topper saves floor space, keeps diapers and clothes within arm's reach, and gives you a dedicated changing surface that can be lifted away when your child outgrows diapers. The key is getting the fit and the safety setup right.
What Exactly Is a Changing Table Topper for a Dresser?
A changing table to go on top of dresser is a portable changing surface designed to rest on a flat dresser top. It usually comes in one of three forms: a contoured changing pad with raised sides, a rigid tray-style topper with a built-in pad, or a wooden frame that holds a standard pad. All three serve the same purpose: they create a defined, wipeable changing zone on furniture you already have.
Unlike a full changing table dresser combo, a topper does not require you to replace your dresser. It is a flexible add-on. Many parents use one during the diaper years and then remove it entirely, leaving a normal dresser behind. If you are still deciding between a dedicated unit and an add-on, our guide to the changing dresser explains the trade-offs.
Types of Changing Toppers You Can Place on a Dresser
Choosing the right format depends on how permanent you want the setup to be and how much storage you need at the changing station.
Contoured Changing Pad
The most common and simplest option. A soft pad with raised sides sits directly on the dresser top. Some models include a safety strap and a non-slip base. Best for parents who want a minimal, easily removable setup.
Tray-Style Topper
A rigid tray with a recessed pad and sometimes small side compartments for wipes and diapers. It stays put better than a loose pad and contains messes more effectively. A good middle ground between a pad and a full unit.
Wooden Frame Topper
A frame that holds a standard changing pad and sometimes adds a small shelf or divider. It feels more like furniture and can be anchored to the wall for extra stability. Best for a long-term nursery setup.
How to Measure Your Dresser for a Proper Fit
Fit is the single most important factor in making this setup safe and comfortable. A topper that overhangs the dresser edge is a tip hazard; one that is too small leaves the pad unstable. Follow these steps before you buy:
- Measure the usable top surface. Record the full length and depth of the dresser top, not the drawer fronts. Note any raised edges, trim, or curved corners that would prevent a flat topper from sitting flush.
- Check the topper's footprint. The topper base should sit fully within the dresser top with a small margin on all sides. No overhang.
- Confirm the pad size. Standard changing pads are commonly around 16 by 32 inches. Make sure the topper accommodates the pad you plan to use without squeezing it.
- Check dresser height. The changing surface should sit at roughly hip or waist height for the adult doing the changing. If the dresser is too low, you will bend awkwardly; too high, and you lose control of the baby.
- Verify stability. Push the empty dresser gently. If it rocks or shifts, anchor it to the wall before adding a topper.
If your dresser top is narrow or unusually shaped, a changing table tray for dresser may fit better than a full-width pad because it has a smaller, more defined footprint.
Safety Setup: What Parents Must Get Right
A dresser-top changing station is safe when the furniture and the topper are both stable and the caregiver never walks away. These are the non-negotiables:
- Anchor the dresser to the wall. Use the anti-tip strap that came with the dresser or a furniture anchoring kit. This is essential in any nursery, and even more so when a baby is lifted on top of the furniture.
- Use a pad with raised sides. A contoured pad helps keep the baby centered. Pair it with a safety strap if the manufacturer includes one.
- Keep one hand on the baby at all times. Never step away, even for a moment. Gather diapers, wipes, and a fresh outfit before you begin.
- Place the topper away from edges. Center it on the dresser top and keep the changing surface clear of loose blankets, pillows, and toys.
- Respect weight limits. Toppers and pads have stated weight limits. Switch to floor changing once your child approaches the limit or becomes too mobile.
- Secure the topper. Use the non-slip base, straps, or mounting hardware included with your model. A changing pad holder for dresser adds a retaining frame that keeps the pad from sliding.
Choosing the Right Dresser for a Changing Topper
Not every dresser is a good candidate. The ideal base dresser has a flat, solid top with no raised lip, a wide stance for stability, and drawers that open smoothly without shifting the whole unit. Height matters too: a dresser that puts the changing surface at waist level reduces strain and improves control.
If you are buying a dresser specifically for this purpose, look for models with a deep top surface and a sturdy frame. Our buying guides cover how to evaluate drawer construction and stability, which matter more here than decorative details. For parents who want the changing function built into the furniture, a change table chest of drawers is worth comparing against the topper approach.
Many families also consider a changing table dresser or a changing table dressers set when they want a permanent solution. The topper method is the better fit when you already own a solid dresser and prefer to keep it long-term.
What to Look For in a Changing Topper
Use these criteria to compare options without getting distracted by marketing claims:
| Feature | What to Check | Why It Matters |
|---|---|---|
| Base stability | Non-slip bottom, straps, or mounting points | Prevents the topper from sliding during use |
| Pad contour | Raised sides at least a few inches high | Helps keep the baby centered on the surface |
| Surface material | Wipeable, waterproof cover | Makes cleanup quick and hygienic |
| Footprint | Fits dresser top with no overhang | Reduces tip and fall risk |
| Weight limit | Stated limit from the manufacturer | Tells you when to transition to floor changing |
| Removability | Lifts off without tools | Lets the dresser return to normal use later |
Step-by-Step Setup on Your Dresser
Once you have the topper and a suitable dresser, setup takes only a few minutes:
- Clear the dresser top completely. Remove lamps, decor, and anything loose.
- Anchor the dresser to the wall using an anti-tip strap.
- Clean and dry the dresser top so the non-slip base grips properly.
- Center the topper on the dresser top, leaving even margins on all sides.
- Secure the pad or tray using the included straps or holder.
- Stock a small basket with diapers, wipes, and a change of clothes within arm's reach.
- Test stability by pressing gently on the pad. It should not shift or lift.
If you are using a separate pad, a changing pad to put on top of dresser guide can help you match pad size to topper size. Some parents prefer a changing station on top of dresser that bundles the pad, tray, and storage in one unit.
Pros and Cons of the Dresser-Topper Approach
Advantages
- Saves space compared with a standalone changing table
- Keeps diapers and clothes in one place
- Reuses furniture you already own
- Removable, so the dresser has a second life
- Can be set up in minutes
Limitations
- Requires a sturdy, anchorable dresser
- Fit is limited by your dresser's top dimensions
- Not all dressers are safe for this use
- Must be removed or reconfigured as the child grows
- Needs careful safety discipline from caregivers
Alternatives Worth Comparing
If your dresser is not a good fit, or you want a more permanent arrangement, consider these options:
- A changing table and dresser in one unit for a built-in solution.
- A changing table with drawers when you need dedicated storage at the station.
- A changing table with drawers and shelves for larger nurseries.
- A floor changing mat for the simplest, lowest-risk setup.
Parents who want extra reassurance often pair a topper with a changing pad holder for dresser to keep the pad firmly in place. If you are still shopping for the base furniture, our dresser buying guide helps you prioritize stability and top-surface dimensions.
Frequently Asked Questions
Will a changing table topper fit any dresser?
No. It needs a flat, solid top that is large enough to hold the topper without overhang. Measure before buying, and avoid dressers with raised edges or curved tops that prevent a flush fit.
Do I need to anchor the dresser to the wall?
Yes. An anti-tip strap is essential whenever a baby is lifted on top of furniture. It is a simple installation and the most important safety step in this setup.
How long can I use a dresser-top changing station?
Until your child approaches the topper's weight limit or starts rolling and pushing up. Many families transition to floor changing once the baby becomes mobile.
Can I use a regular changing pad without a topper?
You can, but a pad alone slides more easily. A topper or pad holder adds a retaining frame and a non-slip base, which improves stability.
What height should the dresser be?
The changing surface should sit at roughly waist or hip height for the caregiver. That keeps you from bending awkwardly and gives you better control of the baby.
Final Thoughts
A changing table topper is one of the most practical nursery additions you can make, provided the dresser underneath is sturdy, anchored, and the right size. Measure carefully, secure the topper, and keep one hand on your baby at all times. Do those three things and you get a compact, comfortable changing station that disappears when the diaper years are over.
If you are comparing setups, our guides on the changing table toppers for dressers and the changing pad holder for dresser go deeper into fit and hardware. For the base furniture, start with our buying guides to choose a dresser that will support the topper safely.