How to Refinish a Dresser

Transform an old, tired piece into a stunning centerpiece. Our complete guide covers everything from prep to the perfect finish.

Jump to Materials List

Refinishing a dresser is one of the most rewarding DIY furniture projects. Whether you’ve found a vintage dresser at a thrift store or want to give new life to a family heirloom, the process can completely change the look and feel of your bedroom. This comprehensive guide will walk you through every step, from sanding and stripping to staining and sealing. By the end, you’ll have the confidence to tackle this project and create a beautiful, custom piece that fits your style.

Before you begin, it’s important to assess the current condition of your dresser. Is the existing finish damaged, scratched, or just outdated? Are there dresser drawers that stick or need repair? Understanding the starting point will help you choose the right approach. If the wood is in good shape, you might opt for a stain to enhance the natural grain. If you prefer a more modern look, consider paint for furniture for a fresh, contemporary feel.

Refinishing isn’t just about aesthetics; it’s also about protection. A new finish protects the wood from moisture, scratches, and daily wear, ensuring your dresser stays beautiful for years. Plus, it’s a sustainable choice that keeps furniture out of landfills. Ready to get started? Let’s dive into the tools and materials you’ll need.

Essential Tools & Materials

Having the right supplies on hand makes the refinishing process smooth and efficient. Here’s a comprehensive list of everything you’ll need:

  • Safety Gear: Respirator mask, safety glasses, nitrile gloves
  • Sanding Supplies: Sandpaper (80, 120, 220 grit), sanding block or orbital sander
  • Stripping (if needed): Chemical stripper, plastic scraper, steel wool (#0000)
  • Cleaning: Tack cloth, mineral spirits, wood cleaner
  • Stain & Finish: Wood stain (oil or water-based), polyurethane (or varnish, shellac)
  • Painting (optional): Primer, paint (chalk, latex, or oil-based), good quality brushes
  • Repair: Wood filler, putty knife, wood glue
  • Other: Drop cloths, painter’s tape, clean rags, screwdrivers for hardware

💡 Pro Tip: For a flawless finish, invest in high-quality sandpaper and brushes. Cheap tools often leave streaks or uneven textures, which can ruin hours of work.

Step-by-Step Refinishing Guide

Follow these steps for a professional-looking result. Take your time—rushing is the number one cause of mistakes!

Step 1: Remove Hardware & Clean

Start by removing all knobs, handles, and hinges. Place them in a labeled bag so you don’t lose them. Next, clean the entire dresser with a wood cleaner or mineral spirits to remove dirt, grease, and old polish. This ensures the new finish adheres properly.

Why it matters: A clean surface prevents bumps and imperfections. If the dresser is particularly grimy, you may need to repeat the cleaning process.

Step 2: Repair Damaged Areas

Inspect the dresser for scratches, dents, or holes. Fill these with wood filler using a putty knife, and let it dry completely. Sand the repaired spots smooth with 120-grit sandpaper. For broken joints or loose drawers, apply wood glue and clamp until dry.

If you have a solid wood dresser, these repairs blend beautifully with the wood. For veneer, be extra gentle to avoid chipping.

Step 3: Strip the Old Finish (if necessary)

If the existing finish is thick or cracked, use a chemical stripper to remove it. Apply the stripper with a brush, let it sit for the recommended time, then scrape off the softened finish with a plastic scraper. Wipe clean with mineral spirits and allow to dry.

Safety first: Work in a well-ventilated area and always wear gloves and a respirator. For an alternative, you can also sand the finish off, but this is more time-consuming.

Step 4: Sanding – The Key to a Smooth Surface

Sanding is the most critical step. Start with coarse grit sandpaper (80) to remove old finish and level the surface. Move to medium (120) and finally fine (220) for a silky-smooth feel. Always sand in the direction of the wood grain.

Between grits, wipe the surface with a tack cloth to remove dust. This prevents scratches from trapped particles. If you’re painting furniture with chalk paint, you may only need to sand lightly, as chalk paint adheres well to most surfaces.

Step 5: Apply Stain or Primer

Now comes the exciting part! If you want a natural wood look, apply wood stain with a clean rag or brush, working in the direction of the grain. Wipe off excess after a few minutes for a lighter tone, or leave it longer for deeper color. Let it dry according to the manufacturer’s instructions.

If you’re painting, apply a high-quality primer first. This ensures even coverage and prevents bleed-through from tannins in the wood. For a white dresser, a good primer is especially important to avoid yellowing.

Step 6: Finish with Topcoat

To protect your newly refinished dresser, apply a clear topcoat. Polyurethane is a popular choice for its durability. Apply thin, even coats with a brush or foam applicator. Sand lightly with 220-grit between coats, and wipe away dust. Apply 2–3 coats for best protection.

For a more natural look, consider wax or oil finishes, which are easier to apply but offer less protection. Your choice depends on the dresser’s intended use. For a nursery dresser, a durable, non-toxic finish is essential.

Step 7: Reattach Hardware & Enjoy

Once the topcoat is fully cured (usually 24–48 hours), reattach the knobs, handles, and hinges. Step back and admire your work! A refinished dresser can transform the entire room.

Consider upgrading the hardware for an extra touch. New dresser drawer pulls can modernize the look instantly and are an affordable change.

Expert Tips & Troubleshooting

🌟 Sanding between coats: Always sand lightly between finish coats. This creates a mechanical bond for the next layer and removes dust nibs, giving you a glass-smooth final surface.

🌟 Dealing with blotches: Some woods, like pine and cherry, stain unevenly. Use a wood conditioner before staining to promote even absorption. This is a game-changer for pine chests or oak dressers.

🌟 Fixing runs: If you notice a drip or run in your finish, wait for it to dry, then sand it flat with 220-grit sandpaper. Wipe clean and apply another thin coat. Patience pays off!

🌟 Refresh vs. Restore: If your dresser is in good condition, a simple dresser makeover with new paint or hardware might be all it needs. Full refinishing is best for pieces with damaged or worn finishes.

Inspiration & Room Ideas

Once your dresser is refinished, it’s time to style it! Explore these ideas to complete your room:

Your refinished dresser can also serve as a stunning focal point in a small bedroom storage ideas layout or be paired with a dresser and nightstand set for a cohesive look. The possibilities are endless!

Refinishing Checklist

  • ☑️ Remove hardware and clean
  • ☑️ Repair scratches and dents
  • ☑️ Strip old finish (if needed)
  • ☑️ Sand thoroughly (80, 120, 220)
  • ☑️ Apply stain or primer
  • ☑️ Apply 2-3 coats of topcoat
  • ☑️ Sand between coats
  • ☑️ Reattach hardware and style

Ready to start your refinishing project?

Check out our recommended products below to find the best finishes, paints, and tools for your dresser makeover.

Best Finishes & Tools for Refinishing

⚠️ AFFILIATE DISCLOSURE: This website contains affiliate links. As an Amazon Associate, we earn from qualifying purchases. If you make a purchase through these links, we may receive a small commission at no additional cost to you. Read our full affiliate policy.

Furniture Refinishing For Beginners: Learn Essential Surface Preparation, Repair, Painting, Staining, and Finishing Techniques Through Beginner-Friendly Projects

Furniture Refinishing For Beginners: Learn Essential Surface Preparation, Repair, Painting, Staining, and Finishing Techniques Through Beginner-Friendly Projects

Check price on Amazon
⚠️ Note: The purchase links above are affiliate links. As an Amazon Associate, we earn from qualifying purchases at no additional cost to you.
Furniture Flipper's Field Manual: An Illustrated Beginner's Guide to Restoring, Refinishing, Painting, Pricing, and Reselling Secondhand Furniture for Profit

Furniture Flipper's Field Manual: An Illustrated Beginner's Guide to Restoring, Refinishing, Painting, Pricing, and Reselling Secondhand Furniture for Profit

Check price on Amazon
⚠️ Note: The purchase links above are affiliate links. As an Amazon Associate, we earn from qualifying purchases at no additional cost to you.
Furniture Refinishing 101: The Complete Beginner’s Guide to Prep, Paint, Stain & Finish

Furniture Refinishing 101: The Complete Beginner’s Guide to Prep, Paint, Stain & Finish

Check price on Amazon
⚠️ Note: The purchase links above are affiliate links. As an Amazon Associate, we earn from qualifying purchases at no additional cost to you.
The Furniture Doctor: A Guide to the Care, Repair, and Refinishing of Furniture

The Furniture Doctor: A Guide to the Care, Repair, and Refinishing of Furniture

Check price on Amazon
⚠️ Note: The purchase links above are affiliate links. As an Amazon Associate, we earn from qualifying purchases at no additional cost to you.
Furniture Refinishing for Beginners: Step-by-Step Projects for Cleaning, Repairing, Sanding, Painting, Staining, Sealing, and Transforming Secondhand Furniture

Furniture Refinishing for Beginners: Step-by-Step Projects for Cleaning, Repairing, Sanding, Painting, Staining, Sealing, and Transforming Secondhand Furniture

Check price on Amazon
⚠️ Note: The purchase links above are affiliate links. As an Amazon Associate, we earn from qualifying purchases at no additional cost to you.
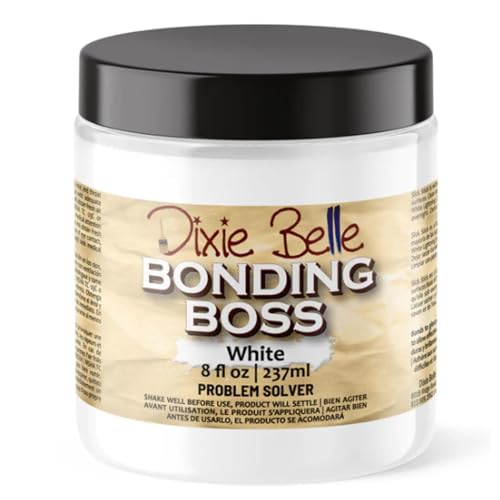
Dixie Belle Paint Company Bonding BOSS Paint Primer - White (8oz) | Problem Solver, Paint Primer + Base to Block Odor, Stains, Bleed Through

Dixie Belle Paint Company Bonding BOSS Paint Primer - White (8oz) | Problem Solver, Paint Primer + Base to Block Odor, Stains, Bleed Through

Check price on Amazon
⚠️ Note: The purchase links above are affiliate links. As an Amazon Associate, we earn from qualifying purchases at no additional cost to you.
Dixie Belle Paint Company Bonding BOSS Paint Primer - Gray (16oz) | Problem Solver, Paint Primer + Base to Block Odor, Stains, Bleed Through

Dixie Belle Paint Company Bonding BOSS Paint Primer - Gray (16oz) | Problem Solver, Paint Primer + Base to Block Odor, Stains, Bleed Through

Check price on Amazon
⚠️ Note: The purchase links above are affiliate links. As an Amazon Associate, we earn from qualifying purchases at no additional cost to you.
Furniture Flipping and Restoration for Beginners: The Step-by-Step Guide to Refinishing Thrifted Furniture and Turning Cheap Finds into a Profitable Side Hustle

Furniture Flipping and Restoration for Beginners: The Step-by-Step Guide to Refinishing Thrifted Furniture and Turning Cheap Finds into a Profitable Side Hustle

Check price on Amazon
⚠️ Note: The purchase links above are affiliate links. As an Amazon Associate, we earn from qualifying purchases at no additional cost to you.

Disclaimer

The information provided on DresserAdvisor is for educational and informational purposes only. We are not furniture professionals, and our content should not replace professional advice from qualified furniture makers, interior designers, or safety experts. Some content may use AI assistance. Always check product safety standards and certifications before purchasing. If you do not agree, please do not use this website. Read the full disclaimer.