Replacement Kitchen Drawer Fronts: Refresh Your Cabinets Without a Full Remodel
Discover how new drawer fronts can transform the look and function of your kitchen. Compare materials, styles, sizing methods, and installation approaches before you choose.
START WITH THE BUYING GUIDEWhy drawer fronts matter: In most kitchens, drawer fronts occupy a significant portion of the visible cabinetry. Replacing them is one of the most efficient ways to modernize a kitchen's appearance while preserving the existing drawer boxes and cabinet structure. This guide walks you through every decision point so you can choose the right replacement fronts for your space.
What Are Replacement Kitchen Drawer Fronts?
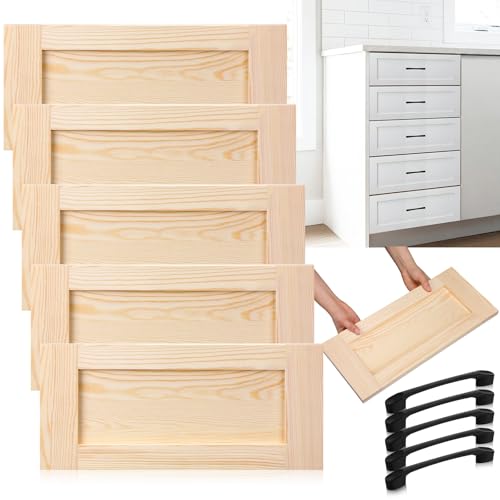
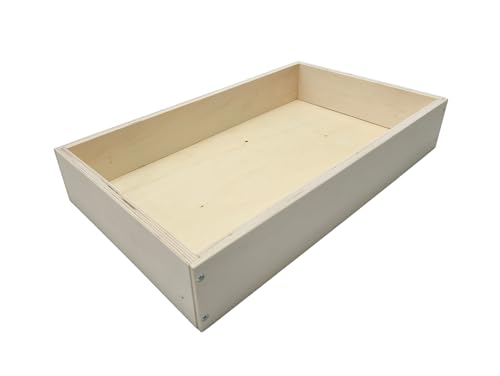
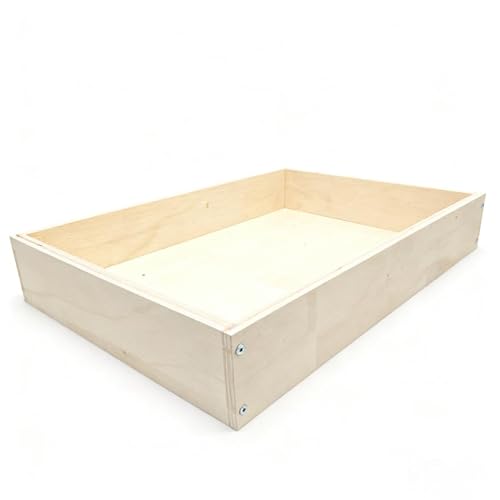
Replacement kitchen drawer fronts are the decorative panels that attach to the face of your existing drawer boxes. They are distinct from the drawer box itself — the box is the functional container that holds utensils, cookware, or pantry items, while the front is the visible surface that defines the style of your kitchen.
Because drawer fronts are removable, they can be swapped without replacing the entire cabinet. This makes them an appealing option for homeowners who want a refreshed look without the disruption and structural work of a full kitchen remodel. The approach is closely related to other cabinet refresh projects, such as replacement kitchen cabinet doors and drawers and replacement kitchen doors and drawers, which address the broader cabinet face.
When Should You Consider Replacing Drawer Fronts?
- Outdated style: The existing fronts feel dated relative to the rest of your home's design language.
- Surface damage: Scratches, dents, peeling veneer, or worn paint detract from the kitchen's appearance.
- Hardware mismatch: You want to switch to a different pull or knob style but the existing fronts cannot accommodate it cleanly.
- Partial remodel: You are updating a few elements — perhaps cabinet doors or kitchen cabinet doors and drawers — and want the drawer fronts to match.
- Functional upgrade: You want deeper or differently proportioned fronts to suit new storage needs.
Key Decisions Before You Buy
Choosing replacement drawer fronts involves more than picking a color. The three decisions below determine whether the new fronts will fit, function smoothly, and look consistent across the kitchen.
1. Measure Accurately
Measurement is the most common source of error in drawer front replacement. Measure the existing drawer front itself — not the cabinet opening — and record the width and height to the nearest fraction. Also identify the overlay type: full overlay, partial overlay, or inset. Each type dictates how the front sits relative to the cabinet frame and affects the size of the replacement panel. For inset designs, measure the opening and account for the reveal gap. For overlay designs, note how much of the cabinet frame the current front covers.
2. Choose the Material
Drawer front materials vary in durability, finish options, and refinishing potential. The table below compares the most common choices using universal tier descriptors.
| Material | Tier | Best For | Considerations |
|---|---|---|---|
| Thermofoil / Laminate | Entry-Level | Clean, uniform finishes with minimal upkeep | Limited refinishing options; heat sensitivity near ranges |
| MDF with Veneer | Mid-Range | Smooth painted finishes and consistent profiles | Edge sealing is important; avoid prolonged moisture exposure |
| Plywood | Mid-Range | Structural stability and screw-holding strength | Edge banding quality affects long-term appearance |
| Solid Wood | Premium | Long-term durability, refinishing, and natural grain | Responds to humidity; requires stable indoor conditions |
3. Select a Style
Drawer front styles generally follow the same design language as cabinet doors. Popular options include:
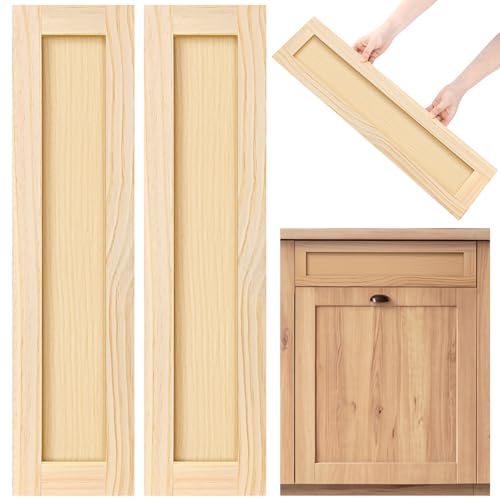
- Shaker: A flat center panel with a simple raised frame. Versatile and widely compatible with transitional and modern kitchens. See related shaker-style furniture for a sense of how this profile translates across cabinetry.
- Slab / Flat panel: A clean, unadorned surface that suits contemporary and minimalist kitchens.
- Raised panel: A traditional profile with a raised center section, often associated with classic and French country or provincial aesthetics.
- Beaded or grooved: Decorative detailing along the frame or panel edges for added texture.
Style consistency matters: drawer fronts should harmonize with the cabinet doors, even if they are not identical. A mismatch in profile or finish is more noticeable in a kitchen than in a bedroom dresser, because the elements sit side by side at eye level.
Hardware Compatibility
New drawer fronts require compatible hardware. Consider both the pull or knob style and the mounting pattern. If you are changing the hardware, check whether the new fronts are pre-drilled or require on-site drilling. Pull placement affects both appearance and ergonomics — centered pulls suit wide drawers, while offset placement can improve grip on narrow fronts. For inspiration on hardware styles, explore pull handles for dresser drawers and mid-century cabinet pulls, which illustrate how hardware choice shifts the character of a drawer face.
Installation Overview
Installation is manageable for a confident DIYer, though precision matters. The sequence below outlines the typical process.
- Remove the old fronts. Detach the existing drawer fronts from the boxes. Label each front and its corresponding box so you can match sizes during reassembly.
- Inspect the drawer boxes. Confirm the boxes are square and structurally sound. Replace any damaged slides or hinges before attaching new fronts.
- Prepare the new fronts. If drilling is required, mark hardware locations using the old fronts as a template where possible. Double-check measurements before drilling.
- Attach the new fronts. Secure each front to its drawer box, then test the drawer's movement. Adjust alignment as needed to achieve even gaps.
- Install hardware. Attach pulls or knobs, then do a final alignment pass across all drawers for consistent spacing.
For kitchens with many drawers, working one bank at a time keeps the process organized and reduces the risk of mixing up fronts of similar dimensions.
How Replacement Fronts Compare to Other Refresh Options
Replacing drawer fronts sits between a minor cosmetic update and a full cabinet replacement. The comparison below helps clarify where this option fits among related projects.
| Approach | Scope | Best For | Effort Level |
|---|---|---|---|
| Refinish / Repaint existing fronts | Surface only | Sound fronts with worn finish | Moderate; depends on prep and drying time |
| Replace drawer fronts only | Drawer faces | Style update with intact boxes | Low to moderate |
| Replace doors and drawer fronts | Full cabinet face | Consistent kitchen-wide refresh | Moderate |
| Full cabinet replacement | Boxes and faces | Structural or layout changes | High; often professional |
Related projects such as unfinished cabinet doors and drawer fronts and unfinished kitchen cabinets with drawers offer additional flexibility if you prefer to finish the fronts yourself. Similarly, cupboard replacement doors address the door side of the cabinet face when both elements need updating.
Common Mistakes to Avoid
- Measuring the opening instead of the front. This is the most frequent cause of ill-fitting replacements. Measure the existing front panel itself unless your design calls for inset fronts.
- Ignoring overlay type. Full overlay, partial overlay, and inset fronts have different size relationships to the cabinet frame. Confirm your type before ordering.
- Mismatching finishes across the kitchen. Order a sample and compare it under your kitchen's lighting before committing to a full set.
- Reusing worn slides. A new front will not solve a drawer that drags. Inspect and replace slides or hinges as needed.
- Skipping alignment checks. Even gaps and consistent reveals are what make a replacement job look professional.
Frequently Asked Questions
How do I measure for replacement kitchen drawer fronts?
Measure the existing drawer front itself, not the opening. Record the width and height precisely, plus the overlay type. For inset or full-overlay designs, measure the cabinet opening and account for the reveal. When in doubt, confirm the measurement method with the supplier before ordering.
Can I replace only the drawer fronts without changing the boxes?
Yes. Replacement drawer fronts are designed to attach to existing drawer boxes as long as the box is structurally sound and the mounting holes align with the new front's hardware pattern. Inspect the boxes and slides first — a sound box is the foundation of a clean result.
What materials are used for replacement kitchen drawer fronts?
Common options include solid wood, plywood, medium-density fiberboard (MDF) with veneer, and thermofoil. Solid wood and plywood offer the best durability and refinishing potential, while MDF provides a smooth painted finish. Thermofoil is an entry-level choice with low maintenance but limited refinishing options.
How long does it take to install new drawer fronts?
A standard kitchen with ten to fifteen drawers typically takes a few hours to half a day. The process involves removing old fronts, attaching hinges or slides, and aligning the new fronts for even gaps. Working one drawer bank at a time keeps the task organized.
Do replacement drawer fronts come pre-drilled for hardware?
It depends on the supplier and the product line. Some fronts arrive pre-drilled for standard hardware patterns, while others require on-site drilling. If you are changing hardware styles, confirm the drilling options before ordering so you can plan the installation accurately.
Ready to Compare Replacement Drawer Fronts?
Explore recommended options below, then check availability and features that match your measurement and style decisions.
VIEW RECOMMENDED OPTIONS