How to Secure a Changing Pad to a Dresser
A practical, safety-first guide to mounting your changing pad so it stays put during every diaper change — plus the dresser anchoring steps most parents overlook.
Why Securing the Pad Matters
A changing pad looks stable on a flat dresser top, but babies roll, kick, and shift their weight in unpredictable ways. Even a contoured pad with raised sides can slide several inches across a smooth painted or laminate surface. Once the pad moves, the baby can roll toward an edge — and a fall from dresser height is a serious injury risk.
Securing the pad solves two separate problems at once. First, it stops lateral sliding, which keeps the baby centered on the pad. Second, it prevents the pad from tipping or lifting at one end when a baby pushes against the raised sides. A properly attached pad stays flat and aligned with the dresser top through the entire change.
There is a third layer to this: the dresser itself must be anchored. A changing pad strapped to an unanchored dresser is only half a solution, because the whole piece of furniture can tip forward if a child pulls on an open drawer or climbs. We cover that separately in the anti-tip section below.
Quick rule of thumb: if you can slide the pad more than half an inch with one hand while pressing down lightly, it is not secured well enough for a wriggling baby.
Before You Start: Dresser Checks
Not every dresser makes a safe changing station. Before you drill, strap, or clamp anything, run through these checks. If the dresser fails any of them, choose a different piece of furniture or use a dedicated changing table.
Surface and stability checks
- Top depth: the dresser top should be at least as deep as the changing pad plus a two-inch margin at the front and back. A pad that overhangs the front edge is a fall hazard.
- Flat, level top: place a spirit level on the dresser top. A sloped or warped surface lets the pad creep toward the low side.
- Wobble test: push gently on one top corner. If the dresser rocks, tighten the frame or add furniture glides before installing the pad.
- Drawer behavior: open each drawer halfway and let go. Drawers that slide open on their own add forward tipping force. Consider drawer stops or a different dresser.
- Back panel access: many mounting methods need access to the back of the dresser. Check whether you can reach behind it or whether you need to pull it away from the wall.
Height and reach checks
The top of the pad should land around waist height for the primary caregiver — roughly 36 to 40 inches from the floor. If the dresser is much taller, you will be reaching up and may lose contact with the baby. If it is much shorter, you will be bending and unable to keep one hand on the baby at all times.
If your current dresser is close but not ideal, a short dresser or a tall dresser guide can help you judge whether a different height would work better before you commit to drilling.
Three Mounting Methods Compared
There are three common ways to attach a changing pad to a dresser. Each has trade-offs in security, permanence, and setup effort. Most parents end up combining method two with the anti-tip anchoring described later.
| Method | Best For | Security Level | Permanence |
|---|---|---|---|
| Built-in safety straps screwed into the dresser top or back | Long-term nursery setups | High | Semi-permanent (small screw holes) |
| No-drill strap looped around back rail or through drawer pulls | Rental homes, temporary setups | Moderate to high | Fully removable |
| Non-slip liner plus contoured pad with grip base | Secondary or travel changing stations | Moderate | Fully removable |
Method 1: Screwed-in safety straps
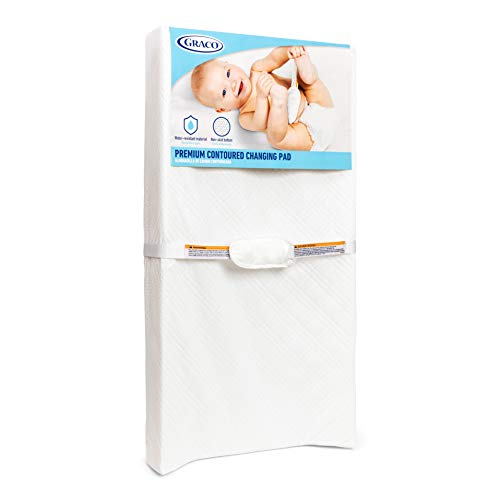
Most contoured changing pads ship with two nylon straps and small screws. The straps run from the underside of the pad down to the dresser top or back panel. This is the most secure option because the pad cannot lift or slide independently of the dresser. The trade-off is two or four small holes in the dresser, which are easy to fill later if you repurpose the piece.
Method 2: No-drill strap routing
If you cannot drill, route the pad’s straps around a structural part of the dresser — typically the back rail, a crossbar, or a solid drawer pull. Avoid looping straps around drawer fronts that open, since the strap will go slack the moment the drawer moves. This method works best on dressers with a solid back rail and a gap you can thread a strap through.
Method 3: Grip liner only
A rubberized or silicone-backed liner under the pad adds friction but does not mechanically attach the pad. Use this as a supplement to a strap method, not as a replacement. On its own, a grip liner is fine for a supervised, momentary change on a low surface, but it is not enough for a full-time nursery station.
Never rely on tape or adhesive strips alone. Command strips, double-sided tape, and adhesive pads lose grip on painted or waxed wood and can fail without warning under a baby’s shifting weight.
Step-by-Step Installation
This sequence works for a standard contoured pad with two built-in straps. Allow about 30 minutes, plus extra time if you need to move the dresser away from the wall.
- Empty the top and clear the back. Remove lamps, decor, and anything fragile from the dresser top. Pull the dresser a few inches from the wall so you can reach the back panel.
- Clean and dry the dresser top. Wipe with a damp cloth and let it dry completely. Dust and furniture polish reduce grip and can interfere with strap tension.
- Place the grip liner. Cut a non-slip liner to the footprint of the changing pad and lay it flat on the dresser top. This goes under the pad, not on top.
- Position the pad. Center the changing pad on the liner with equal margins at the front and back. The raised sides should face the left and right, not the front edge.
- Route the straps. Feed each strap from the underside of the pad down the back edge of the dresser. If your dresser has a back rail, loop the strap around it. If not, mark screw positions on the back panel.
- Fasten the straps. For the screw method, pre-drill pilot holes slightly narrower than the screws, then drive them through the strap ends into the dresser. For the loop method, pull the strap snug and secure it with the included buckle or cam lock.
- Tension test. Press down on the center of the pad and try to slide it forward, backward, and sideways. It should move less than half an inch in any direction. Adjust strap tension if it moves more.
- Anchor the dresser to the wall. Attach an anti-tip strap from the dresser’s back panel to a wall stud. This step is not optional — see the next section.
- Push the dresser back and re-check. Slide the dresser back into position, leaving enough clearance for the wall strap. Re-run the tension test one final time.
If you are setting up a nursery from scratch, the same sequence applies to most contoured pads, including the type covered in our guide to a rubber changing pad for a dresser. Rubber-backed pads are heavier and grip better, but they still need mechanical attachment.
No-Drill Options for Rental Homes
Renters and anyone using a family heirloom dresser often prefer to avoid drilling. There are three practical no-drill approaches, listed from most to least secure.
- Back-rail strap routing. Thread the pad’s straps around the dresser’s back crossbar or rail. This is nearly as secure as screwing into the back panel, provided the rail is solid wood rather than a thin decorative strip.
- Buckle-style pad with a full wrap strap. Some pads come with a single long strap that wraps under the dresser top and buckles on the side. These work well on dressers with an open back or a removable back panel.
- Grip liner plus a weighted base. A heavy rubber liner combined with a pad that has a weighted or high-friction base adds stability without hardware. This is the least secure no-drill option and should be paired with constant supervision.
If your dresser has a thin or missing back panel, check whether the frame has a solid rail you can use. A second-hand dresser often has a sturdier frame than modern flat-pack pieces, which makes back-rail routing easier.
Anchoring the Dresser Itself
Securing the pad keeps the pad on the dresser. Anchoring the dresser keeps the dresser upright. Both are required for a safe changing station, and the anti-tip step is the one most often skipped.
Furniture tip-over incidents typically involve a child pulling on an open drawer or climbing on the piece. A dresser with a changing pad on top has a higher center of gravity, which increases the tipping force. An anti-tip strap or bracket connects the dresser’s back panel to a wall stud and prevents forward rotation.
Anti-tip anchoring steps
- Locate a wall stud using a stud finder. Avoid drywall anchors alone — they are not rated for the dynamic load of a tipping dresser.
- Attach the wall bracket to the stud with the included lag screws.
- Attach the dresser-side bracket to the top back rail or back panel of the dresser.
- Connect the two brackets with the anti-tip strap and tighten until there is no slack.
- Test by pulling the top front edge of the dresser toward you. It should not move more than a fraction of an inch.
If you are choosing a dresser specifically for a nursery, look for models that include anti-tip hardware in the box and have a solid back panel. Our nursery dressers category covers models built with this in mind, and the sage green dresser for nursery guide discusses finish and frame considerations that affect anchoring.
Combine both anchors. The pad strap and the wall strap are separate systems. One keeps the pad in place, the other keeps the dresser in place. Neither substitutes for the other.
Daily and Weekly Safety Checks
Hardware loosens over time, especially in a nursery where the dresser is used many times a day. Build these checks into your routine.
Every change
- Keep one hand on the baby at all times, even with a secured pad.
- Confirm the pad has not shifted from its centered position.
- Check that the safety strap buckle or cam lock is engaged.
Weekly
- Run the tension test: press and try to slide the pad in all directions.
- Tug the anti-tip strap to confirm it is still tight against the wall bracket.
- Check the screws under the pad for loosening and tighten if needed.
- Wipe the dresser top and liner to remove dust that reduces grip.
Monthly
- Inspect the dresser frame for wobble and tighten any connecting bolts.
- Check drawer slides for smooth operation — sticky drawers get pulled harder, which adds tipping force.
- Re-verify that the wall anchor is still seated in the stud.
If the dresser is also used for general storage, keep heavier items in the lower drawers. A top-heavy dresser is harder to anchor safely, and the dresser organization guide covers weight distribution in more detail.
Frequently Asked Questions
Do I need to secure a changing pad to a dresser?
Yes. A changing pad that can slide or tip creates a fall risk for a baby. Securing it with straps, an anti-slip base, or a mounting bracket keeps the pad stable during every diaper change.
What is the best way to attach a changing pad to a dresser?
The most reliable method combines a non-slip pad underneath, the built-in safety straps screwed into the dresser top or back panel, and an anti-tip strap anchoring the dresser itself to a wall stud.
Can I use a changing pad on top of a dresser without drilling?
You can use a no-drill approach with a contoured pad that has a high-grip base plus straps looped around the dresser’s back rail or through the drawer pulls. However, drilling into the dresser top or back panel is the most secure long-term option.
How high should a changing pad be on a dresser?
The top of the changing pad surface should sit around waist height for the caregiver, typically 36 to 40 inches from the floor. This keeps you from bending and reduces the chance of losing contact with the baby.
Is it safe to use a dresser as a changing table?
Yes, provided the dresser is anchored to a wall stud, the top is deep enough for the pad with margins at the front and back, and the pad is mechanically secured. A dresser that wobbles, has a shallow top, or cannot be anchored should not be used as a changing station.
How often should I check the straps and anchors?
Check the pad strap tension at every change, run a full tension test weekly, and inspect the anti-tip anchor monthly. Tighten any loose screws or straps immediately.
For a broader look at choosing and setting up nursery storage, explore the full dresser buying guide and the bedroom storage section. If you are still deciding on a dresser model, the dresser types overview compares heights, drawer counts, and frame styles that work well as changing stations.