Repainting Painted Furniture: Complete Guide
Transform your old dresser or chest with a fresh coat of paint. Learn the best techniques, preparation steps, and paint types for a professional, durable finish.
Why Repaint Furniture?
Repainting painted furniture is one of the most rewarding DIY projects. Whether you're updating a dated dresser, restoring a vintage chest, or giving new life to a children's bedroom dresser, a fresh coat of paint can completely transform the look and feel of a room. It's a cost-effective way to match your furniture to new decor, cover up wear and tear, or simply express your personal style.
However, repainting over existing paint requires careful planning to ensure the new finish adheres properly and lasts for years. This guide covers everything from evaluating your piece to applying the final topcoat, so you can achieve results that look like they were done by a professional.
Step 1: Assessment & Preparation
Before you buy a single can of paint, take time to assess your furniture. This crucial step will determine the success of your project.
Evaluate the Current Finish
Identify what kind of paint is on the furniture. Latex, oil-based, or chalk paint? You can test this by applying a small amount of denatured alcohol to a hidden area. If the paint softens, it's likely latex. Oil-based paint will not react. This knowledge helps you choose the right primer and topcoat.
Check for damage like scratches, chips, or water rings. These will need to be repaired before painting. Use wood filler for dents and sand down any rough edges.
Clean Thoroughly
Grease, dirt, and grime are the enemies of a good paint job. Clean the entire piece with a degreaser or a mixture of warm water and mild dish soap. Rinse with clean water and allow to dry completely. For a deep clean, especially on oak pieces or vintage trunks, use a product like TSP (trisodium phosphate).
💡 Pro Tip: Lightly sanding the entire piece with 220-grit sandpaper creates a "tooth" for the new paint to grip. This is essential even if you're using a paint that claims "no sanding required." A quick scuff-sand is always beneficial for adhesion.
Remove Hardware
Take off all knobs, pulls, and hinges. This makes painting easier and prevents paint from getting into moving parts. Label the hardware or put it in a bag so you don't lose it. If you're considering replacing the hardware, now is the perfect time. Explore options like handles for dresser drawers or gold handles for dresser to give your piece a modern or classic update.
Step 2: Choosing the Right Paint & Supplies
Selecting the right type of paint is critical for the durability and finish of your project. Here are the most popular options for repainting furniture:
- Chalk Paint: Adheres well to almost any surface with minimal prep. It has a matte, velvety finish and is great for achieving a vintage or shabby chic look. Often requires a wax or topcoat for durability. Perfect for pieces like a red dresser or mustard dresser that you want to give a rustic feel.
- Milk Paint: A traditional, eco-friendly paint that creates a slightly textured, authentic antique look. It also requires a topcoat.
- Acrylic Latex Paint (High-Quality): Excellent for high-traffic pieces like children's dressers or a dresser for children's room because it's durable, washable, and comes in any color. Use a high-quality primer and a topcoat for maximum durability.
- Enamel / Oil-Based Paint: Provides an extremely hard and durable finish, ideal for bureau drawer knobs or pieces that get heavy use. However, it has strong fumes and requires mineral spirits for cleanup.
Essential Supplies:
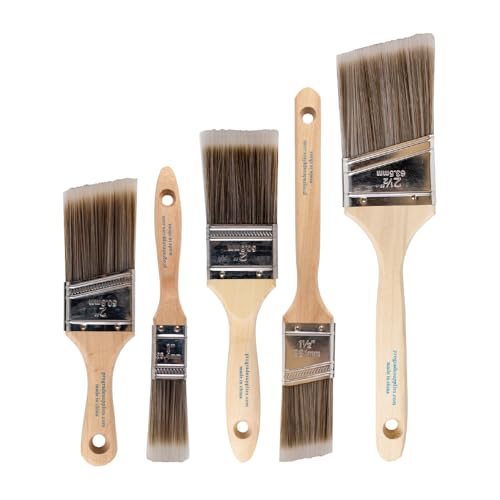
- Quality paintbrush (synthetic for water-based paint, natural for oil-based)
- Foam roller for smooth surfaces
- Primer (choose one that matches your paint type)
- Topcoat (polyurethane, wax, or polycrylic)
- Sandpaper (various grits: 120, 220, 320)
- Tack cloth for removing dust
- Paint thinner or water for cleanup
- Drop cloths and painter's tape
Step 3: Priming & Painting Techniques
Priming is a non-negotiable step for repainting furniture, especially if you're painting over a dark color or a glossy finish. A quality primer blocks stains, prevents bleed-through, and ensures even coverage.
Apply Primer
Use a high-quality primer like Zinsser BIN (shellac-based) or Kilz. Apply a thin, even coat with a brush or roller. Allow it to dry completely according to the manufacturer's instructions, then lightly sand with 220-grit sandpaper to smooth out any brush marks and remove dust with a tack cloth. For a paint dresser without sanding project, an excellent primer is even more critical.
Painting Techniques
Apply the paint in thin, even coats. This is the secret to a professional finish without drips or brush marks. Use a high-quality brush for detailed areas and a foam roller for flat surfaces. Work in the direction of the wood grain. For a smooth, modern finish, consider using a paint sprayer. Check out our guide on painting furniture with a paint sprayer for best results.
Let each coat dry completely before applying the next. Most furniture projects require two to three coats. Lightly sand with 320-grit sandpaper between coats for an ultra-smooth finish.
💡 Pro Tip: If you're aiming for a distressed look, paint a base coat in a contrasting color, let it dry, apply your topcoat, and then lightly sand the edges and corners to reveal the color beneath.
Step 4: Topcoats & Final Touches
Applying a topcoat is essential for protecting your hard work. It seals the paint, adds durability, and can alter the sheen (matte, satin, or gloss).
- Polyurethane (Water- or Oil-Based): Offers excellent protection against scratches and water. Water-based polyurethane is low-odor and dries clear. Oil-based polyurethane adds a warm amber tone.
- Wax: Provides a beautiful, soft sheen and is easy to apply. It offers moderate protection and is great for chalk-painted pieces. Reapply wax periodically.
- Polycrylic: A water-based topcoat that is clear, non-yellowing, and provides good protection.
Apply the topcoat with a clean brush or cloth in thin layers. Sand lightly between coats with 400-grit sandpaper for an ultra-smooth finish. Most pieces need at least two coats of topcoat for adequate protection, especially high-use items like black drawers or a white drawers set.
Finally, reattach the hardware or install new ones. A fresh set of modern drawer pulls or bureau drawer knobs can significantly enhance the final look.
Common Mistakes to Avoid
Even experienced DIYers can make mistakes. Here are the most common pitfalls to avoid when repainting furniture:
- Skipping preparation: Not cleaning or sanding properly is the number one cause of paint failure. Always prep thoroughly.
- Using the wrong primer: Painting over an oil-based finish without a proper bonding primer will cause the new paint to peel.
- Applying thick coats: This leads to drips, brush marks, and a longer drying time. Thin coats are always better.
- Forgetting to sand between coats: Sanding between coats ensures a flawless, smooth finish and promotes adhesion.
- Not protecting the finished piece: A good topcoat is essential for durability, especially for pieces that get daily use.
Ready to Start Your Furniture Makeover?
Repainting painted furniture is a skill that saves you money, allows for creative expression, and results in a unique piece that perfectly fits your home. With the right preparation, quality materials, and a little patience, you can achieve stunning results that rival professional work.
Browse our selection of recommended products below, including top-rated paints, primers, and hardware to ensure your project is a success. Remember to check our spray painting guide for a flawless finish on larger projects.
If you're feeling inspired to take on more projects, explore our other guides on dresser makeover ideas and DIY dresser projects.